
Drive, controls and brakes
All the cables have been replaced. The throttle cable is now a YZ250K OEM type and the clutch and brake cables are aftermarket. I cleaned up the brake stay arm, polished and drilled it as per the Lechien bike. Instead of the spherical bearing in the arm, i used two sealed roller bearings. This seems to work well....
New Reed/Windham Renthal bend bars have been fitted and new OEM levers have been fitted to the original perches. The original throttle was retained but cleaned up and repainted. Pro Taper Pillow Top grips were fitted to the bars and the mounts were polished before being refitted.
The pegs are aftermarket wider ones. I used some new OEM springs and pins.
The chain is a new non-oring gold chain with an alloy 50 tooth rear sprocket and standart 12 tooth JT front sprocket as recommended in the Yamaha Tech Report and in various magazines. There are two chain guides. The roller type was replace with an allballsracing one that does not need a bearing. The white large chaing guide was replaced with an 84 YZ125 OEM type that goes further up the swingarm and over the bearing seal cap.
There were literally hundreds of small bolts, washers, grommets, o'rings, seals etc.. replaced on the bike. It just went on and on. I used works washers where i could to give it a bit of a look. These are available from Bolt.
Brakes were all freshly replaced with new drum style arrangements and all bearings in the wheels were replaced. All the brake arms were polished and everything checked.
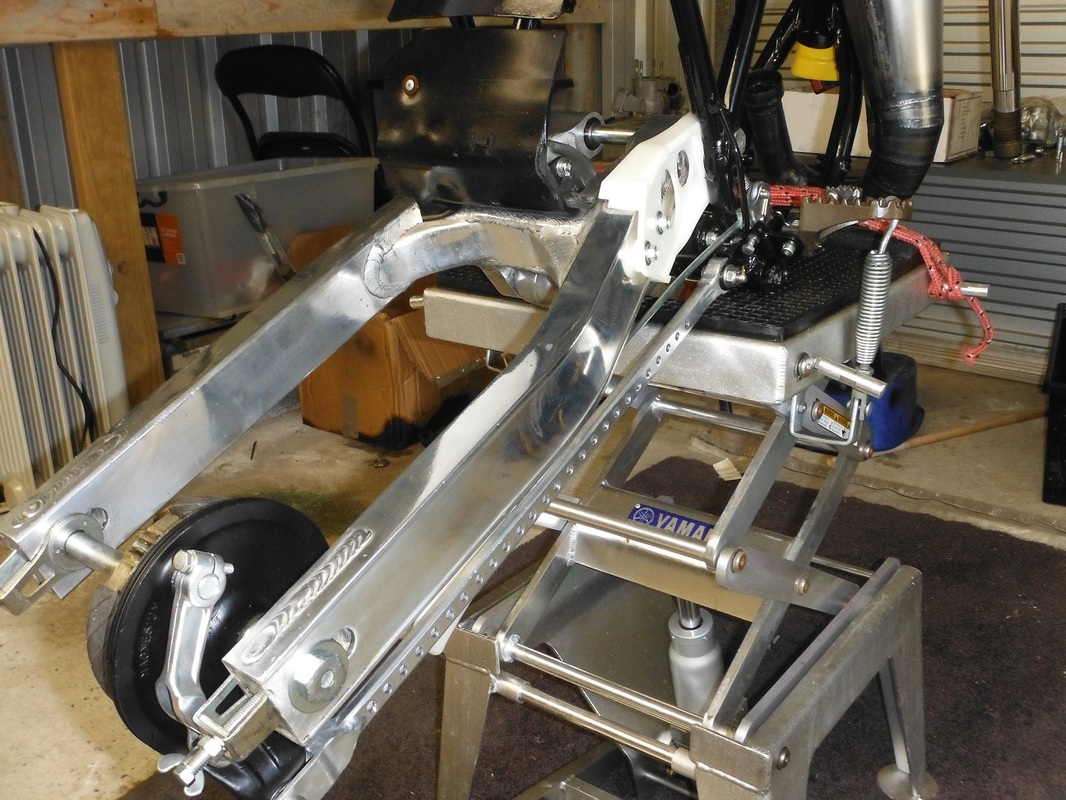
I stripped the wheels down to their individual components. The hubs were blasted and cleaned and then painted epoxy satin black. All new bearings were fitted. The spokes were polished with autosol. These components were then sent to Ash's Spoked Wheels in Queensland for a full rebuild. They are using new Excel Takasago gold rims with new gold anodized nipples. The only difference in rim size is a 2.15 for the back instead of the original 1.85. These rims are as per the Lechien works bike. The rebuilt wheels were returned and i had the local bike shop fit new heavy duty tubes and rim locks.
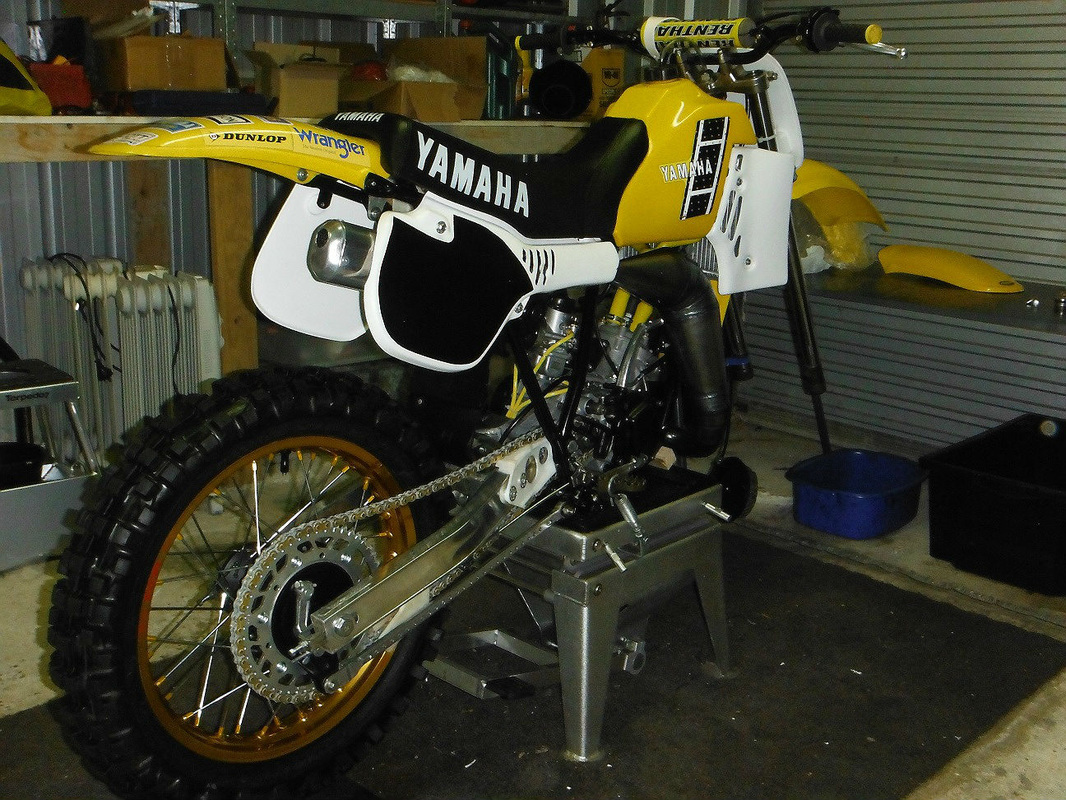
Below is some pics of the rear wheel fitted up. I also added the non - o'ring gold Regina chain. The non o'ring chain provides less drag than the heavier o'ring style chains.
Update: I have built up another set of wheels for the K and decided to tackle the task myself. I used all original components. I sanded all the scratches out of the original rims and then had them blasted and powder coated gloss black. I had the hubs blasted and powder coated satin black. I purchased two new sets of OEM spokes, but have kept the old ones to be electroplated at a later date. I have put together a tutorial to help you rebuild your set if you want to go that way, as it is easy once you sit down with it and give it a go.
| 1983_yz_it_wheel_rebuild.pdf |
Dual Leading Shoe Brakes: I am fitted the dual leading shoe setup that the OW125 had back in 1983. These were the Rolls Royce of brakes back in the day and were very effective, but ultimately superseded by discs. I searched the net and found some instructions on correct fitment and adjustment, so thanks to the folk on the forums for input.
Mounting the wheel -
A) Mount the Front Wheel on the Forks. Before you tighten the axle, spin the wheel and grab the front brake lever. While keeping the lever held firmly tighten the axle. This centers the backing plate.
B) The Axle Pinching fork typically tightens into the left hand leg while the right side allows the fork tubes to be parallel.
C) For the Axle Pinching Type take the bike off the stand and pump the forks with the axle pinch loose. This aligns the fork legs. Tighten the axle pinch clamp.
Dual Leading Shoe Brakes -
1) Have the axle tight and the wheel up in the air so it spins freely
2) Back off on the link rod so ONLY the shoe connected to the cable lever is going to rub (rod fully in, rotate down)(one rub per wheel rotation).
3) Adjust the cable adjusters until the that one shoe drags very lightly
4) While still at this cable adjuster setting start changing the link rod length until the linked shoe starts dragging then go a little more on that adjustment, 1/2 turn or so (two rubs per rotation).
5) The linked shoe must contact first and drag harder in this light application so as to make up for the slack in pivot bushings etc
6) Test ride a bit and stop and try adjusting another 1/2 turn on the linkage, it may even be better but this is the definitive way it must be done to get them both to grab.