Body
The frame was i poor condition and needed some tig welding. A new number plate lug was attached and a plate added where the chain rubs. The it was blasted, zinc undercoated and powder coated gloss black. All hardware was freshly zinc plated including axles, engine mounts, bolts, springs and chain adjusters etc..
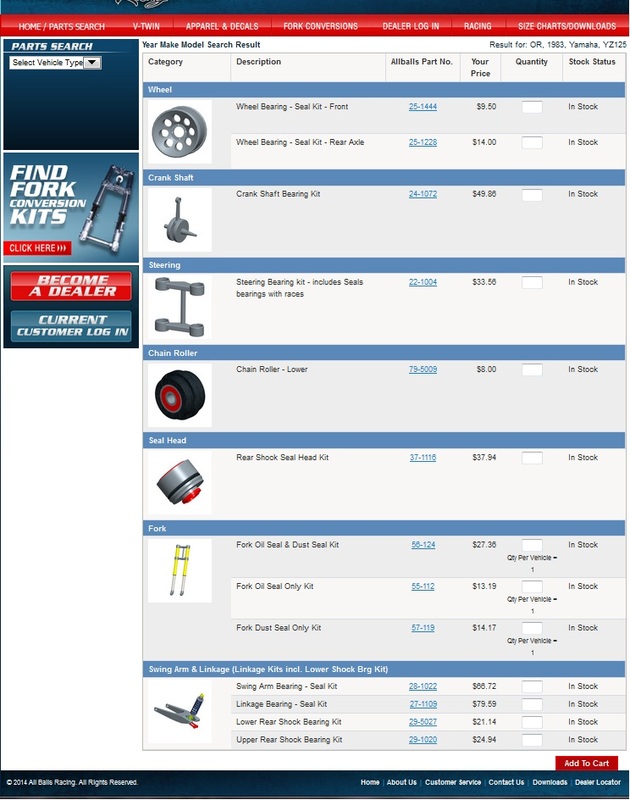
All the bearings and seals on the bike have been replaced. This includes steering, wheels, swingarm, linkages, and shock. I went to Allballsracing.com and they have the lot. I ordered everything and they sent the lot very fast. I opened the box and the quality is terrific. There are all sorts of clips, seals, bearings, spacers and knickers/knackers. Very comprehensive and should make the bike like new again.
Below is the gear they have for the YZ125K with part numbers and prices as of 2014.
First up was fitting the new steering stem bearings. I froze a few things here and heated some other things there then bang, whack and it all went back together.
The swingarm took some time. The anodizing was all scratched up, so i made a caustic bath and soaked it for a few minutes to get all the anodizing off. Then a bit of sanding and a nice buff for a polished look. The allballsracing swingarm and linkage bearing kits were fantastic. All sorts of bearings, seals, bushes and bits and pieces and it all fitted up nicely. I just whacked out all the old rusted and knackered seals, bushes and bearings. Then i gave everything a light hone. I pressed all the needle roller bearings back in using a 4" G clamp, large washer and various sockets. Everything was then fitted up using the newly zinc coated bolts and plenty of grease.
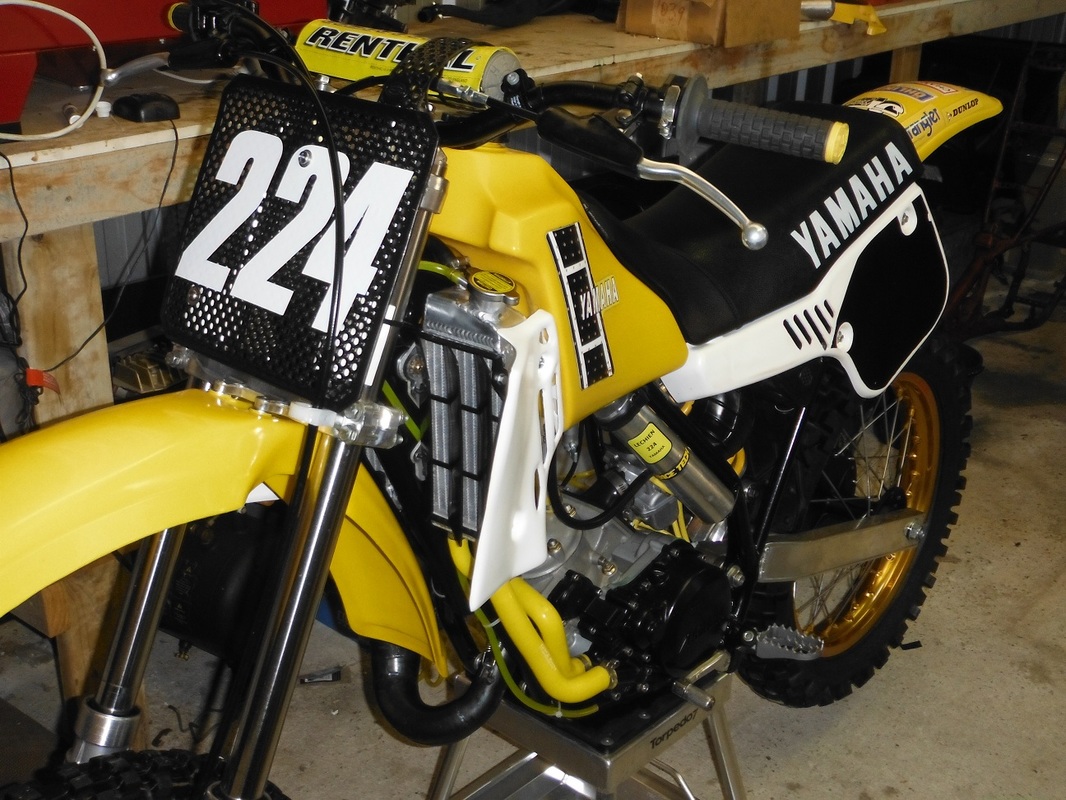
DC plastics arrived and they are not too bad. I had the shrouds custom
done in white. Bolting up was a pretty easy process. Cutting the slots
to look similar the the Lechien OW125 took a bit more time and then
taping them up and painting the number plate backgrounds. Front and
back guards were also fitted after a sand and buff with Plastic Renew. I
took a trip to Masters and they have 8.8 bolt kits with about 150
various size bolts from 5mm to 8mm for $25. The only problem is that
they have a dichromate yellow gold coating. I soaked them for 30
seconds in vinegar and that removes the gold while retaining the zinc
underneath
The tank was sanded back and Wicked Tough decals applied. They are great decals and hopefully wont bubble off as i think they have worked out how to keep them on. Then some Plastic Renew was applied to get a nice shine on the tank.
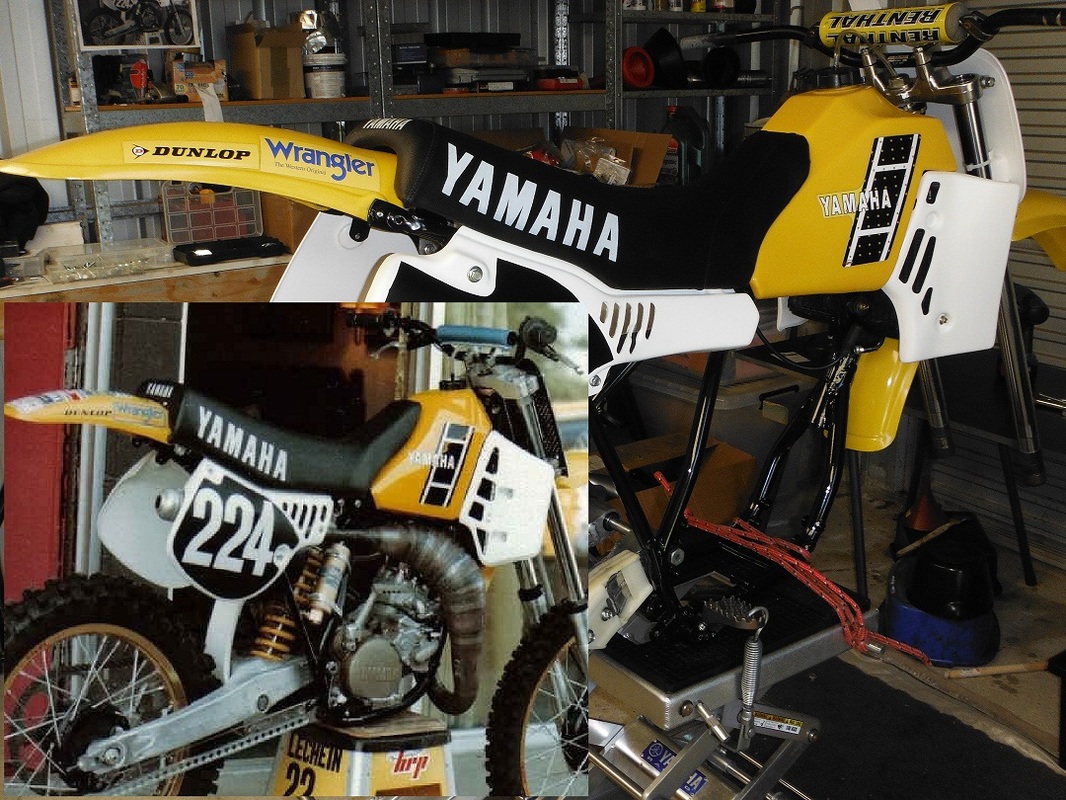
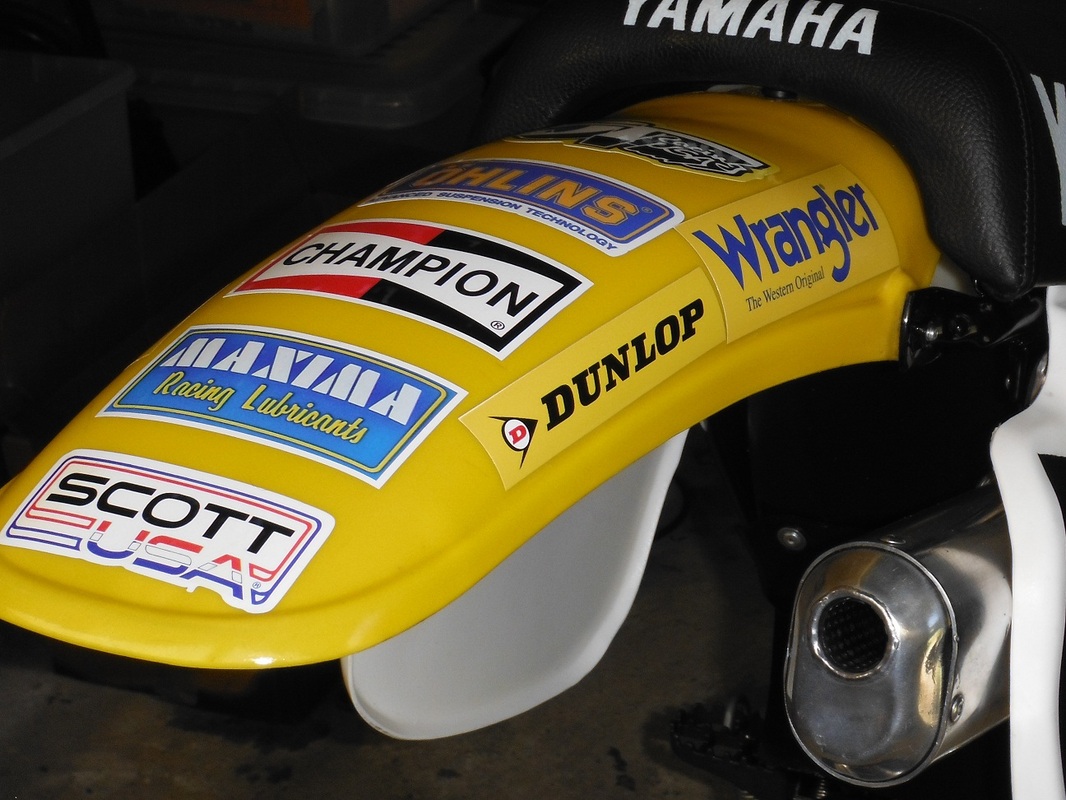
In keeping with the Lechien tribute OW125 spirit, i made up some decals the same as on his rear fender. I used http://www.stickeryou.com/2 to create the logos from ones i downloaded from the net. I then edited them and made a few A4 sheets worth. I also have some other decals i designed and added to the A4 decal sheets. You can do most of the editing and stuff on their website. Its not a bad website to remember as i created my custom decals, had them printed on vinyl to two A4 sheets and they only took 2 days to make them and posted them fast to Oz. All up cost was only $25 bucks.
Pic below of them on the bike.
The tank was sanded back and Wicked Tough decals applied. They are great decals and hopefully wont bubble off as i think they have worked out how to keep them on. Then some Plastic Renew was applied to get a nice shine on the tank.
In keeping with the Lechien tribute OW125 spirit, i made up some decals the same as on his rear fender. I used http://www.stickeryou.com/2 to create the logos from ones i downloaded from the net. I then edited them and made a few A4 sheets worth. I also have some other decals i designed and added to the A4 decal sheets. You can do most of the editing and stuff on their website. Its not a bad website to remember as i created my custom decals, had them printed on vinyl to two A4 sheets and they only took 2 days to make them and posted them fast to Oz. All up cost was only $25 bucks.
Pic below of them on the bike.
Finally found a Preston Petty "hole shot" vented front number plate in black. I used the mounting brackets from the DC front plate and it fitted straight up. This is almost identical to the one Lechien ran back in 83.